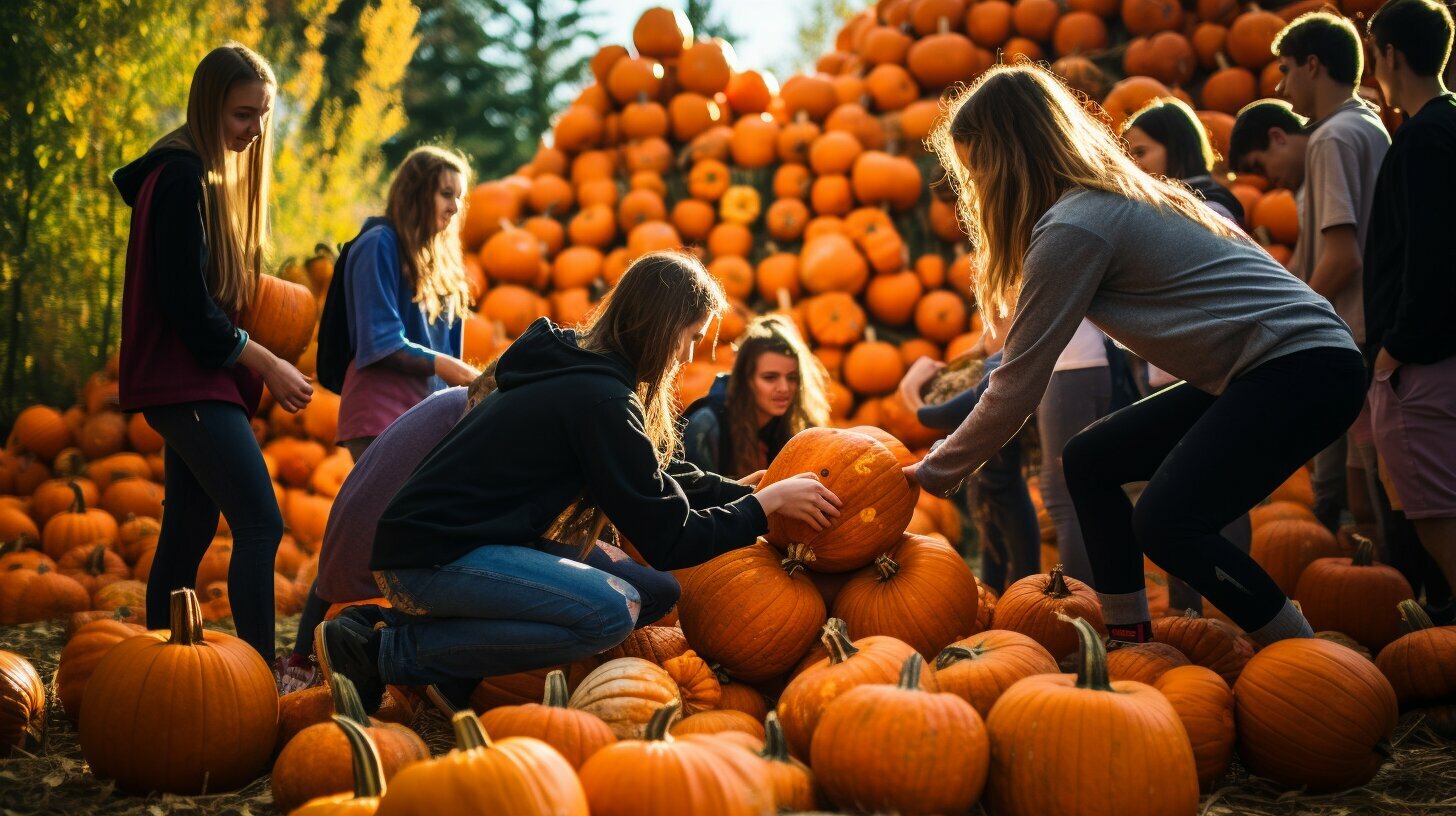
So you are looking for carving pumpkin ideas? It starts with choosing the right pumpkin, ensuring it has a sturdy stem and flat bottom. Tips include cutting the lid from the bottom to prevent cave-ins, sketching the design on paper first, and using serrated knives or small saws for carving. Tips on preserving the pumpkin's freshness include spreading petroleum jelly on the cut edges and soaking it facedown in cold water if it shrivels. Lighting options include candles, Christmas lights, or battery-operated votives. The guide also lists essential tools and provides tips from experts. Additional information includes how long carved pumpkins last, alternative carving tools from the toolbox, precautions for carving, and ideas for using pumpkin flesh and seeds.
Key Takeaways:
- Choosing the right pumpkin is crucial for successful carving.
- Use serrated knives or small saws for better precision.
- Preserve the freshness of the pumpkin by spreading petroleum jelly on the cut edges.
- Consider using alternative lighting options like candles, Christmas lights, or battery-operated votives.
- Explore alternative carving tools and get creative with pumpkin flesh and seeds.
Choosing the Right Pumpkin to Carve
To carve the perfect Halloween pumpkin, start by choosing the right one with a sturdy stem and a flat bottom. The stem is not only essential for aesthetics but also helps maintain the pumpkin's freshness. Look for a pumpkin with a stem that is firmly attached and has no signs of damage or decay. A sturdy stem will make it easier to lift and handle the pumpkin during the carving process.
In addition to a sturdy stem, it's important to select a pumpkin with a flat bottom. This provides stability and prevents the pumpkin from rolling or tipping over while you work on it. A flat bottom will also ensure that the finished jack-o'-lantern sits securely when displayed.
When choosing your pumpkin, consider the size and shape that best suits your design ideas. Whether you prefer a large pumpkin for a detailed masterpiece or a smaller one for a simpler design, pick one that inspires you and reflects your creativity. Remember, the right pumpkin is the foundation for a successful carving experience!
Guidelines for Choosing the Right Pumpkin
| Guidelines | Description |
|---|---|
| Sturdy Stem | Look for a pumpkin with a firm, intact stem that is securely attached to the pumpkin. |
| Flat Bottom | Ensure the pumpkin has a flat bottom to provide stability and prevent rolling. |
| Size and Shape | Select a pumpkin that suits your design ideas, whether you want a large or small pumpkin. |
Choosing the right pumpkin sets the stage for a successful carving session. With a sturdy stem, a flat bottom, and the perfect size and shape, you're ready to bring your Halloween visions to life!
Pumpkin Carving Tips
Follow these essential Halloween tipsfor carving your pumpkin like a pro. Start by carefully cutting the lid from the bottom of the pumpkin instead of the top. This technique helps prevent the lid from caving in due to the weight of the pumpkin and provides better stability for your design. Remember to angle the cut slightly inward so that the lid sits securely on top.
Before diving into carving, take a few minutes to sketch your design on paper. This allows you to visualize your creation and make any necessary adjustments before starting. Once you're satisfied with your design, use a water-based marker to transfer the sketch onto the pumpkin's surface. This way, you can easily erase any mistakes or make changes as you go along.
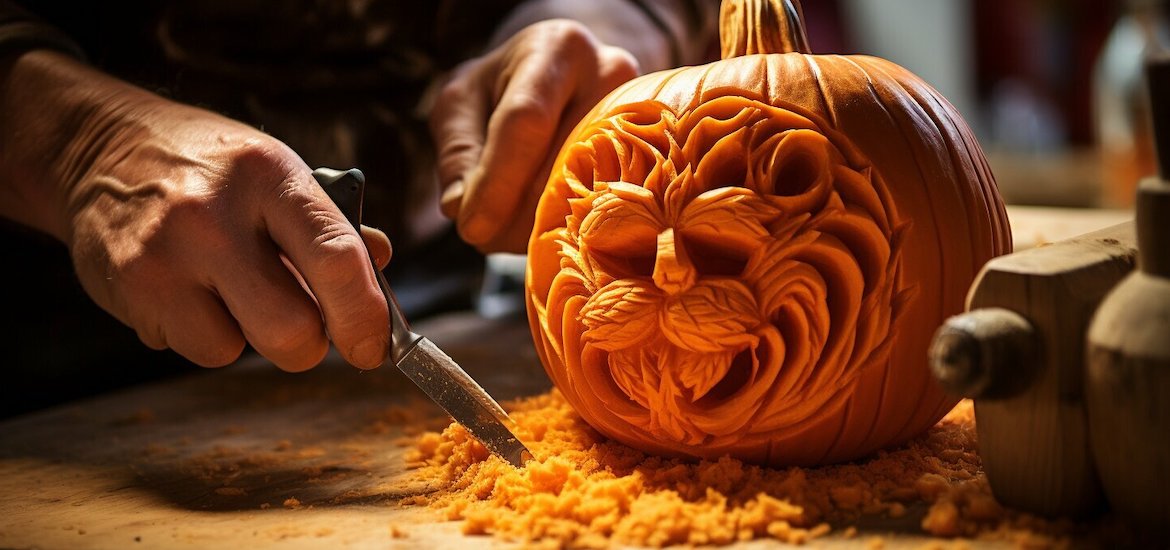
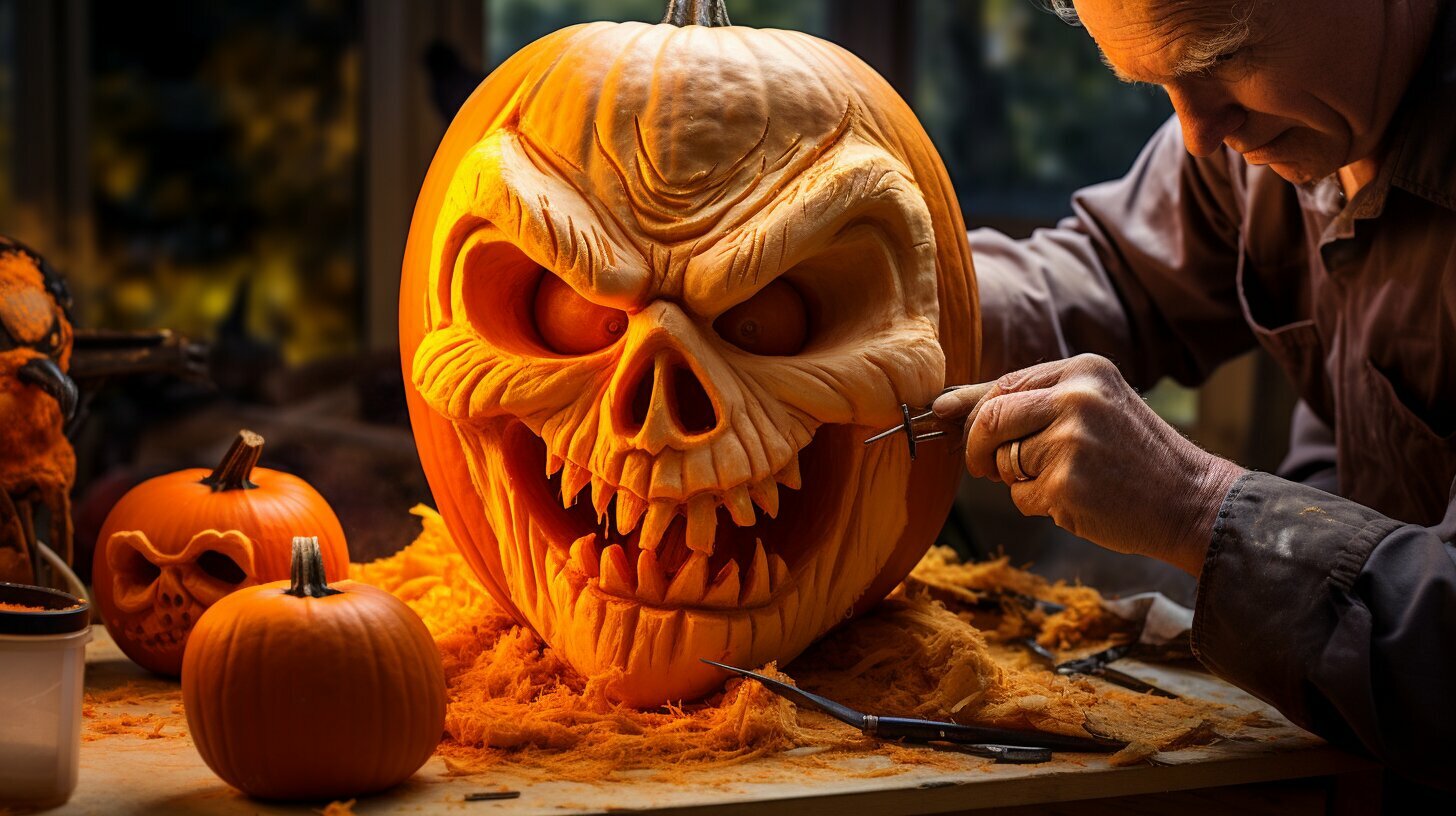
When it comes to the actual carving, serrated knives or small saws are your best friends. These tools provide better control and precision, allowing you to create intricate details and smooth cuts. Remember to always cut away from yourself and keep your hands clear of the blade. Take your time, and don't rush the process.
| Essential Carving Tips | |
|---|---|
| 1. Cut the lid from the bottom for better stability. | 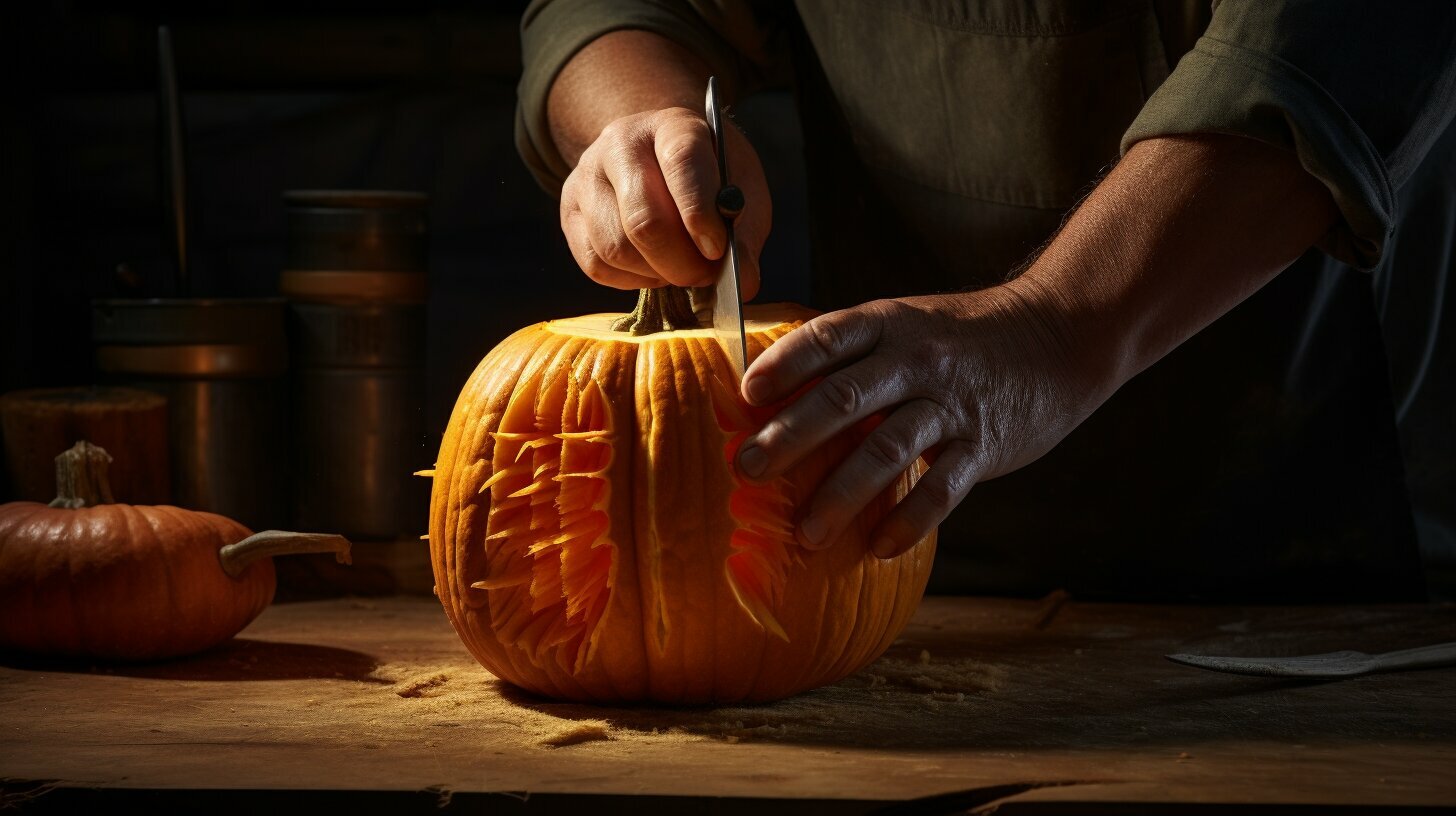 |
| 2. Sketch your design on paper first. | 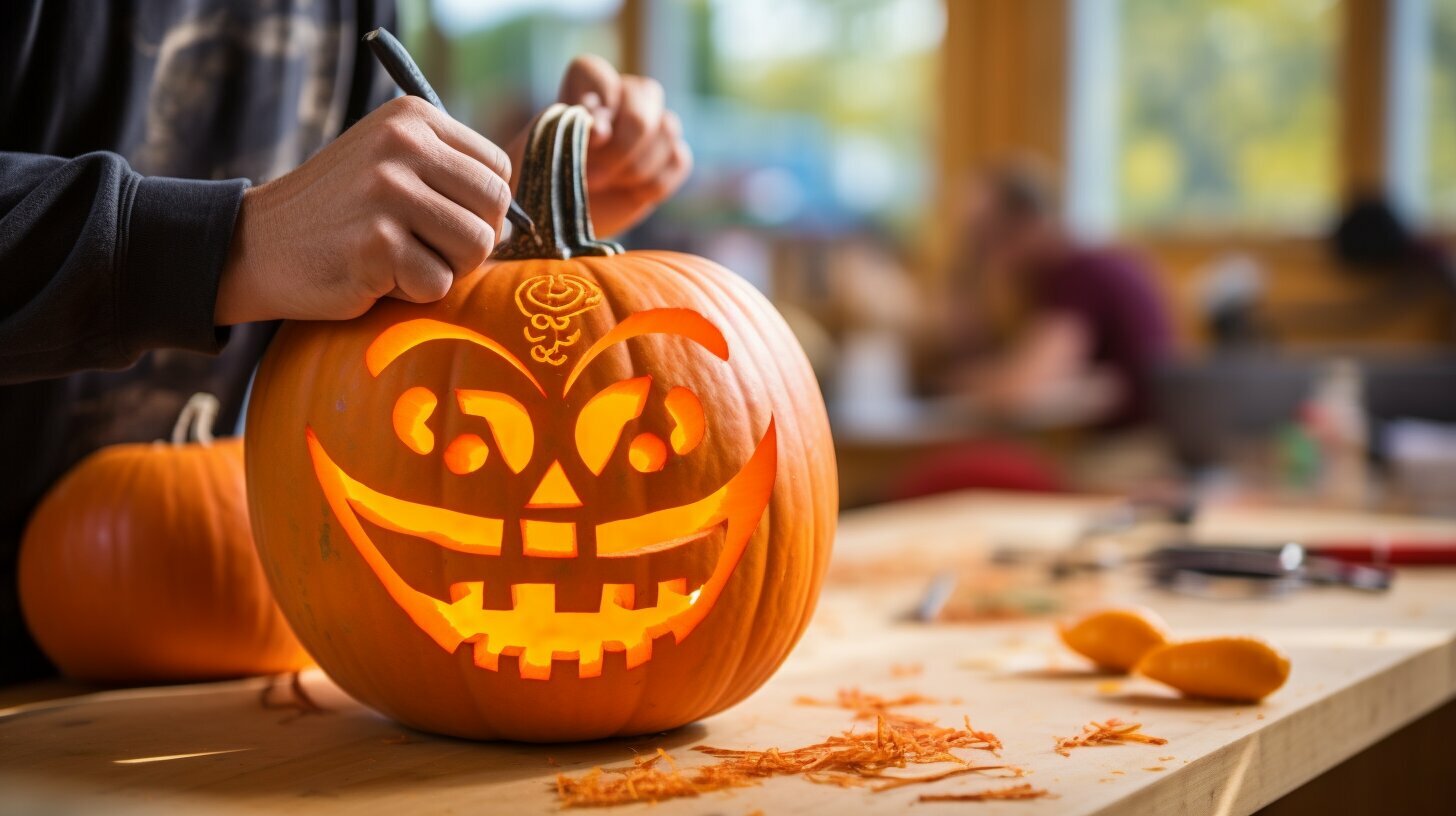 |
| 3. Use serrated knives or small saws for precise carving. |  |
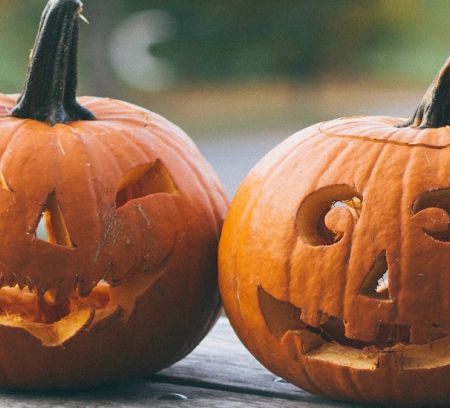
"Carving pumpkins is a beloved tradition during Halloween, and these essential tips will help you create the perfect jack-o'-lantern. Remember to have fun and let your creativity shine!"
Preserving the Pumpkin's Freshness
Keep your carved pumpkin looking fresh and vibrant with these preservation techniques. After spending time and effort creating the perfect Halloween jack-o'-lantern, it's essential to ensure its longevity. Whether you want your creation to last until Halloween night or even longer, these simple tips will help maintain its freshness.
Firstly, applying petroleum jelly to the cut edges of your pumpkin can help prevent it from drying out too quickly. The jelly acts as a barrier, sealing in moisture and slowing down the natural decay process. Gently spread a thin layer of petroleum jelly on the exposed areas, including the lid and any openings where you've carved the design. This technique will help your pumpkin stay fresh and vibrant for a longer time.
If you notice your pumpkin starting to shrivel or dehydrate, don't panic! A simple solution is to soak it facedown in cold water for a few hours. This rehydrates the pumpkin, restoring its freshness and plumpness. Fill a large container or bathtub with cold water and place the pumpkin in it, making sure it is fully submerged. Let it soak for a few hours or overnight, and you'll see a noticeable improvement in its appearance.
To further extend the lifespan of your carved pumpkin, consider keeping it in a cool and shaded location when not on display. Extreme heat and direct sunlight can accelerate the drying process, causing your pumpkin to wither faster. Additionally, avoid exposing it to excessive moisture, as this can lead to mold growth.
By following these preservation techniques, you can enjoy your beautifully carved pumpkin for an extended period. Display it proudly on your porch, use it as a centerpiece for Halloween parties, or showcase it in a spooky pumpkin patch. With the right care, your jack-o'-lantern will remain a festive and eye-catching decoration throughout the fall season.
Lighting Options for Jack-o'-Lanterns
Discover the various lighting options to bring your jack-o'-lantern to life. When it comes to illuminating your carved pumpkin, there are several options to choose from. With the right lighting, you can add a spooky season ambiance to your Halloween decorations.
Candles
One classic option is to use candles. The flickering glow of a candle creates an eerie and traditional effect. It's important, however, to exercise caution when using open flames. Make sure to keep the pumpkin away from flammable materials and never leave it unattended.
Christmas Lights
Another popular choice is to use Christmas lights. These twinkling lights provide a festive touch and are an easy way to illuminate your pumpkin. You can wrap them around the stem or place them inside the carved pumpkin to create a magical glow. Opt for LED lights to ensure safety and energy efficiency.
Battery-operated Votives
If you prefer a flameless option, battery-operated votives are a great choice. These small LED lights mimic the flickering flame of a candle and are safe to use indoors or outdoors. They come in various colors, allowing you to create different effects and moods with your jack-o'-lantern.
Remember to choose the lighting option that suits your preferences and ensures safety. With the right lighting, your carved pumpkin will become the centerpiece of your Halloween decorations!
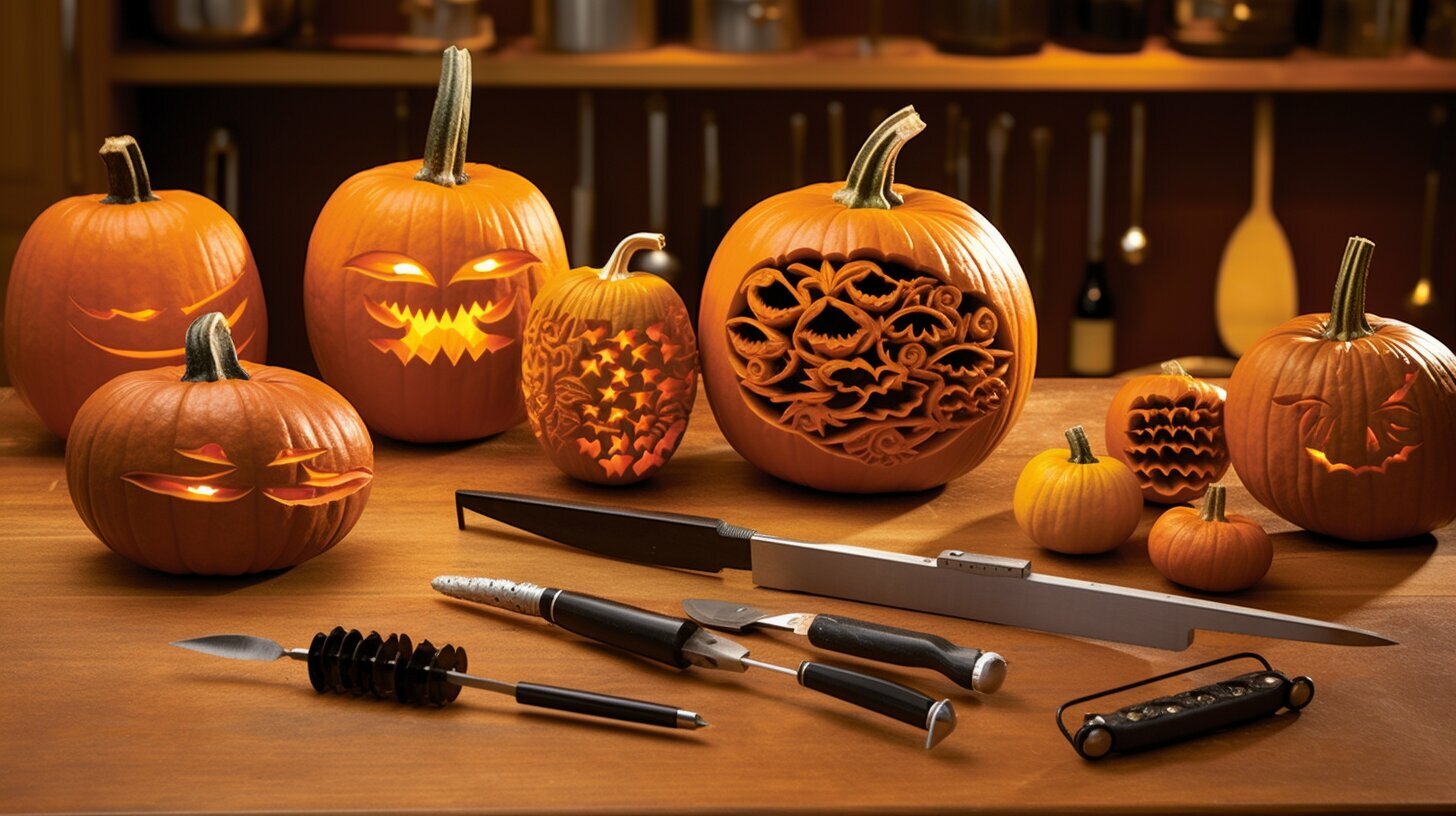
Pumpkin Carving Tools
Before starting your pumpkin carving adventure, make sure you have these essential tools. With the right tools at hand, you'll be able to create intricate designs and carve the best Halloween pumpkin. Here are the must-have tools for pumpkin carving:
- Serrated knives: These knives have a jagged blade that makes carving smooth and precise. Use them for cutting through the pumpkin's tough skin and creating intricate details.
- Small saws: These handy tools are perfect for carving straight lines or larger areas. They allow for more control and precision, especially when cutting out shapes and patterns.
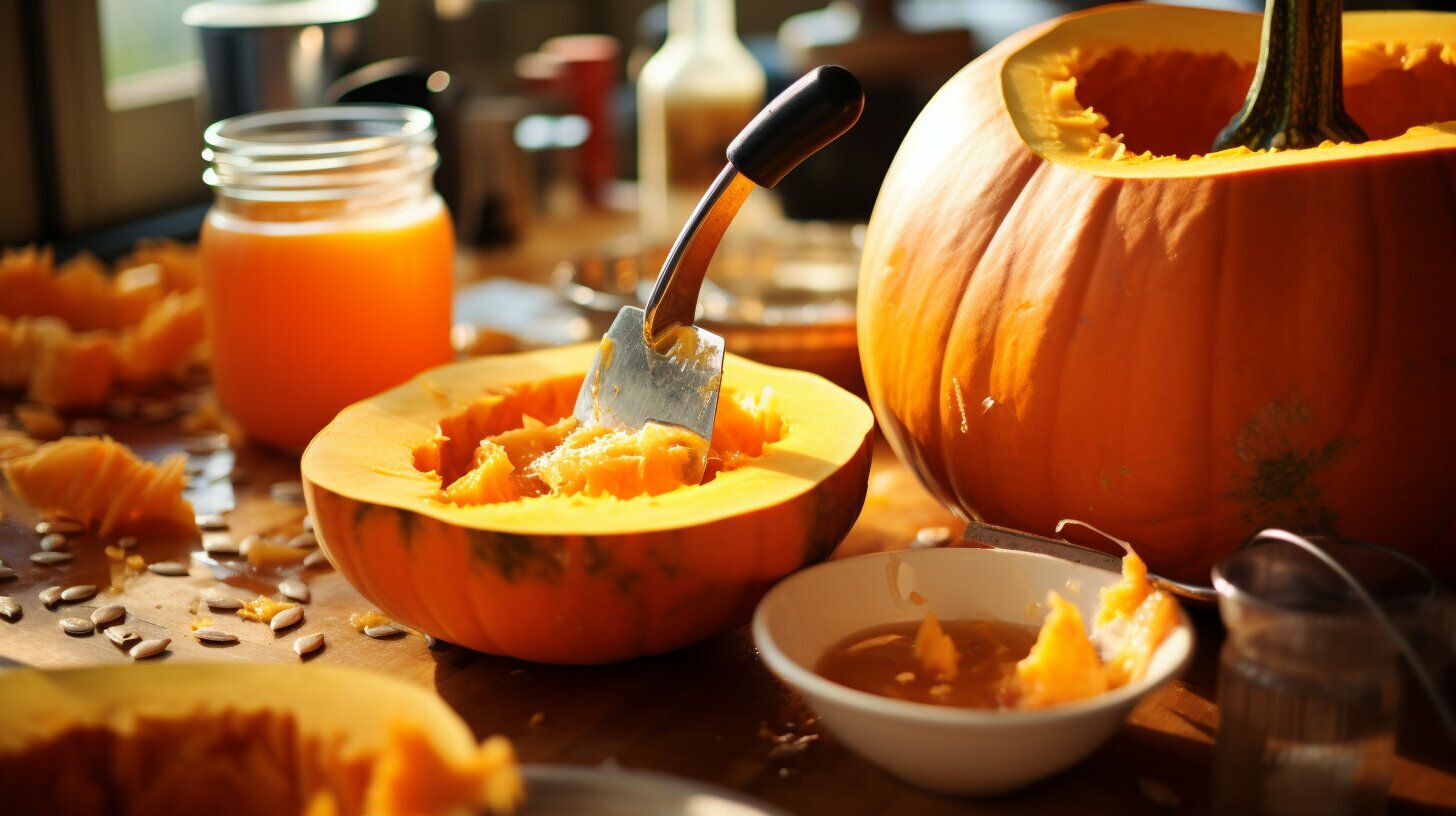
- Scoops and scrapers: These tools help in cleaning out the inside of the pumpkin, removing the pulp and seeds. A scoop with a serrated edge can be used for thinning the pumpkin walls and creating a translucent effect.
- Pumpkin carving patterns: Stencils or templates can make the carving process easier, especially for beginners. They provide a guide for creating intricate designs and can be used as a reference while carving.
- Etching tool: An etching tool or a poker can be used to create detailed designs by removing only the top layer of pumpkin skin. This adds texture and depth to your carved pumpkin.
- LED lights: Instead of traditional candles, consider using LED lights for lighting up your pumpkin. They are safer and last longer, ensuring that your jack-o'-lantern shines brightly throughout the Halloween season.
Remember, having the right tools can make all the difference in creating a masterpiece out of your pumpkin. So gather these essential tools before you embark on your pumpkin carving adventure!
| Tool | Function |
|---|---|
| Serrated knives | For cutting through the pumpkin's tough skin and creating intricate details. |
| Small saws | Perfect for carving straight lines or larger areas, providing control and precision. |
| Scoops and scrapers | Help in cleaning out the inside of the pumpkin, removing pulp and seeds. |
| Pumpkin carving patterns | Stencils or templates that provide a guide for creating intricate designs. |
| Etching tool | Allows for detailed designs by removing only the top layer of pumpkin skin. |
| LED lights | A safer alternative to candles for illuminating your carved pumpkin. |
FAQ: Pumpkin Carving
Look for a pumpkin with a sturdy stem and a flat bottom to make carving easier.
Cut the lid from the bottom to prevent cave-ins, sketch your design on paper first, and use serrated knives or small saws for better precision.
Spread petroleum jelly on the cut edges and soak the pumpkin facedown in cold water if it starts to shrivel.
You can use candles, Christmas lights, or battery-operated votives to illuminate your carved pumpkin.
Some essential tools include knives, saws, scoops, and carving templates.
Yes, we have tips and advice from experienced pumpkin carvers to help you achieve the best results.
Carved pumpkins typically last around one to two weeks, but you can prolong their longevity by following proper preservation techniques.
Aside from traditional tools, you can try using cookie cutters, power tools, or even a drill for unique carving designs. Don't forget to save the pumpkin flesh and seeds for delicious recipes!
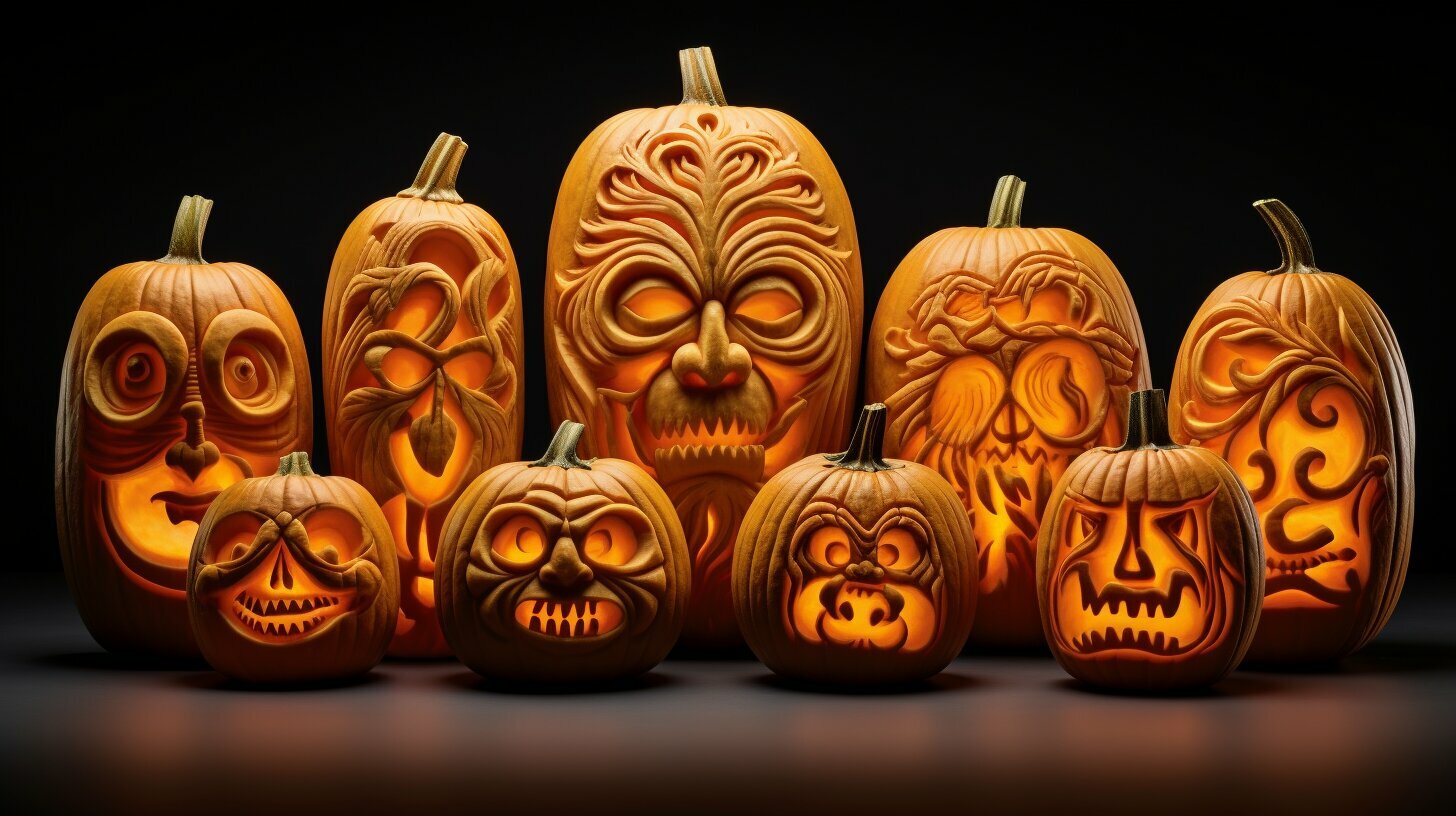
Pumpkin Carving Ideas for Beginners
Learn from the experts with these valuable tips and advice for carving your Halloween pumpkin. Carving pumpkins is a quintessential part of Halloween, and with the right guidance, you can create the best jack-o'-lantern on the block.
When it comes to choosing the right pumpkin, look for one with a sturdy stem and a flat bottom. This will make the carving process much easier and ensure that your pumpkin stands upright without toppling over. Remember, a solid foundation is key!
Now, let's talk about carving techniques. To prevent cave-ins, try cutting the lid from the bottom rather than the top. This way, the lid will rest securely on the pumpkin without falling through. Additionally, sketching your design on paper before carving will help you visualize the final product and avoid any mistakes.
- Use serrated knives or small saws for carving. These tools provide better precision and allow you to create intricate details on your pumpkin.
- Spread a thin layer of petroleum jelly on the cut edges of your pumpkin to preserve its freshness. This will help prevent it from drying out too quickly.
- If your carved pumpkin starts to shrivel, don't panic! Simply soak it facedown in cold water for a couple of hours to rehydrate the flesh.
When it comes to lighting your jack-o'-lantern, you have several options. You can use traditional candles for an authentic flickering effect. Alternatively, you can opt for Christmas lights or battery-operated votives for a safer and longer-lasting illumination. The choice is yours!

Lastly, let's talk about tools. To achieve the best results, it's important to have the right tools for the job. Here's a list of essential pumpkin carving tools:
| Tool | Description |
|---|---|
| Pumpkin Scoop | Use this tool to remove the seeds and pulp from the inside of the pumpkin. |
| Pumpkin Saw | A small saw with a serrated blade that allows for intricate carving. |
| Pumpkin Drill | Use this tool to create perfect circles or holes in your pumpkin. |
| Pumpkin Carving Knife | A sharp, thin-bladed knife for precise carving. |
| Pumpkin Etching Tool | Use this tool to create fine details and textures on the pumpkin's surface. |
Remember, these are just the basics. Feel free to explore and experiment with other tools to unleash your creativity and carve a unique masterpiece.
Carved Pumpkin Longevity
Discover how long your carved pumpkin can last and learn how to extend its lifespan. Carving pumpkins is a quintessential part of Halloween, and nothing beats the thrill of creating a spooky spectacle with your own hands. But once your masterpiece is complete, how do you make it last?
Carved pumpkins generally have a lifespan of about 5 to 10 days, depending on various factors such as temperature, humidity, and the freshness of the pumpkin itself. However, with proper care and a few simple tricks, you can extend the life of your carved creation.
To keep your pumpkin looking fresh and vibrant for as long as possible, start by spreading petroleum jelly on the cut edges. This helps seal in the pumpkin's moisture, preventing it from drying out too quickly. Additionally, if you notice your pumpkin starting to shrivel, you can soak it facedown in cold water for a couple of hours to rehydrate it.
| Tip: | Spread petroleum jelly on the cut edges to seal in moisture. |
|---|---|
| Soak the pumpkin facedown in cold water to rehydrate it if it shrivels. |
Another way to prolong your pumpkin's lifespan is by avoiding exposure to extreme temperatures. If you live in a region with fluctuating weather conditions, consider bringing your carved pumpkin indoors during particularly hot or cold days. This will help preserve its freshness and prevent premature decay.
Now that you know how to extend the life of your carved pumpkin, you can enjoy your jack-o'-lantern for longer and impress all your neighbors with its longevity. So grab your carving tools and let your creativity shine this Halloween season!
Pumpkin Carving Tools
Get creative with alternative carving tools and learn how to utilize every part of the pumpkin. While traditional tools like serrated knives and small saws are commonly used for pumpkin carving, there are other unique tools you can try to achieve different effects. For example, a melon baller or cookie cutter can create intricate patterns, while a power drill can make perfect holes for a twinkling effect when lit up.
When using alternative tools, remember to exercise caution and prioritize safety. Always supervise children, wear protective gloves, and be mindful of the blade or tool you're using. It's also a good idea to have a sturdy surface to work on to prevent accidents or injuries.
Once you've finished carving your pumpkin, don't let any part go to waste. The flesh of the pumpkin can be roasted and used for soups, pies, or even as a tasty addition to risottos. Don't forget about the seeds either! Roasted pumpkin seeds make a delicious and nutritious snack. Simply wash and dry the seeds, toss them with some olive oil and salt, and then roast them in the oven until golden brown.
So, go ahead and let your creativity flow! Explore different tools, techniques, and ideas to carve the perfect Halloween pumpkin. Remember to involve your family and friends in these types of Halloween fun activities, and enjoy the process of bringing your jack-o'-lantern to life.
Conclusion
Carving the perfect Halloween pumpkin is an art that brings joy, excitement and can create all sorts of Halloween games to the fall season. This ultimate guide to pumpkin carving has provided step-by-step instructions to help you create the best jack-o'-lantern for your Halloween festivities. Starting with choosing the right pumpkin, ensuring it has a sturdy stem and flat bottom, you can now embark on a creative journey.
Remember to cut the lid from the bottom to prevent cave-ins and sketch your design on paper before carving to ensure precision. Serrated knives or small saws are recommended for better carving results. To preserve your pumpkin's freshness, spread petroleum jelly on the cut edges and consider soaking it facedown in cold water if it starts to shrivel.
When it comes to lighting options for your jack-o'-lanterns, you can choose from traditional candles, festive Christmas lights, or convenient battery-operated votives. The guide also includes a list of essential tools to have on hand and features tips and advice from expert pumpkin carvers.
Finally, if you're wondering how long your carved pumpkins will last, it's good to know that with proper care, they can last up to a week. And if you're looking to explore alternative carving tools, this guide has got you covered. Don't forget to have fun and get creative with the pumpkin flesh and seeds after carving!


AshleyPugh ;
Ashley Pugh is one of the Co-Founders of Familydaysout.com and has been committed to writing family related content since 2008. There isn't much about family attractions that Ashley doesn't know, after visiting hundreds of them worldwide over the last 20 years.
Leave a comment